
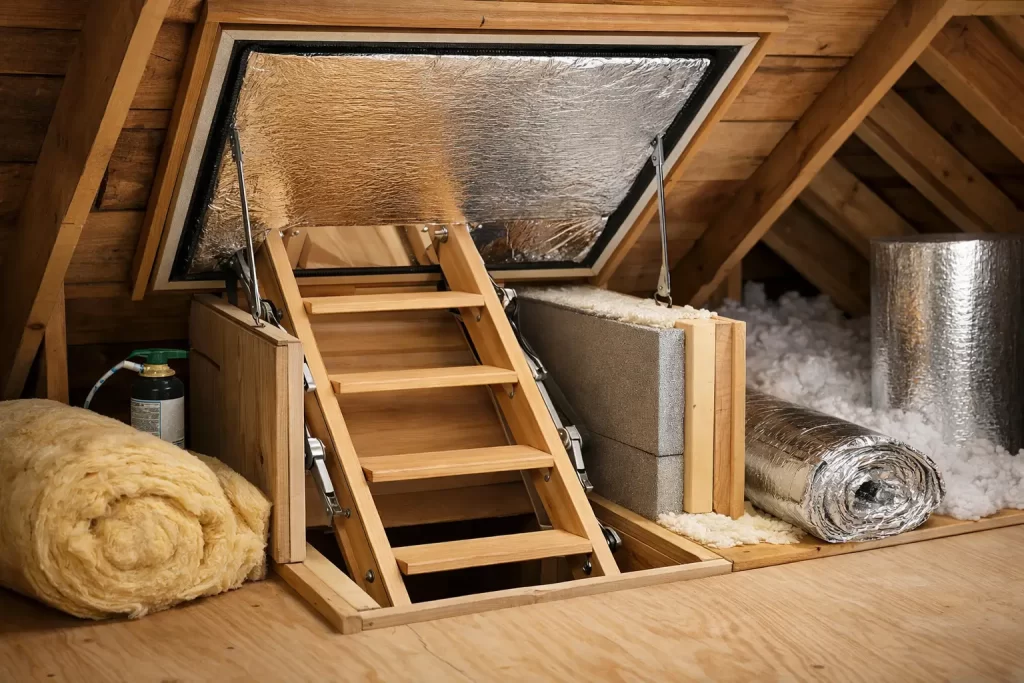
If your attic feels colder than it should and the landing below always seems drafty, the hatch is often the weak spot. Good attic hatch insulation ideas do not need to be complicated, but they do need to deal with two things properly – heat loss and air leakage. Miss either one, and you can still end up with a cold draft around the opening, even if the attic itself has plenty of insulation.
For most homeowners, the issue is not the attic floor insulation. It is the access point. An attic hatch is a break in the ceiling, and if it is thin, poorly sealed, or badly fitted, warm air escapes through it far more easily than people expect. That is why the best fix is usually not one single product. It is a combination of insulation, sealing, and a hatch that actually closes tightly.
Why attic hatches lose so much heat
An attic hatch sits right in the middle of the ceiling envelope. If the door is just a basic board or an old plywood panel, it has very little thermal resistance. On top of that, most older hatches have gaps around the edges. That means you are not only losing heat through the hatch itself, but also through uncontrolled airflow around it.
This matters in everyday use. You might notice a colder hallway, condensation near the opening, or a slight musty feel from attic air coming down into the house. In some homes, the hatch can also rattle slightly on windy days. Those are all signs that the seal is not doing its job.
Attic hatch insulation ideas that make the biggest difference
1. Add rigid foam board to the hatch door
One of the simplest attic hatch insulation ideas is to attach rigid foam insulation to the top side of the hatch. This works best on a drop-down hatch or a simple lift-out panel where there is enough clearance above the opening.
Rigid foam gives you decent insulating value without adding too much weight. That balance matters. If you overload the hatch, it can become awkward to lift, harder to close properly, or less safe to handle. For a basic hatch used only occasionally, foam board is often a sensible upgrade because it is light and reasonably effective.
The catch is fit. If the foam is cut badly or catches on the frame, it can stop the hatch from seating properly. A hatch that has insulation but does not close flush can still leak warm air.
2. Install weatherstripping around the frame
Insulation slows heat transfer, but air sealing is what stops drafts. A compressible weatherstrip around the hatch frame helps create a tighter seal when the hatch is closed.
This is one of the most cost-effective improvements because the gaps around the edge are often where the real problem is. Even a well-insulated hatch can underperform if warm indoor air is constantly escaping around the perimeter.
It does depend on the hatch design. Some older hatches sit unevenly or have warped timber frames, so standard weatherstripping may only partly solve the issue. In those cases, the hatch may need adjustment or replacement rather than just a strip added around the edge.
3. Fit hatch latches to compress the seal
A lot of homeowners add insulation and sealing tape, then wonder why the hatch still leaks. The reason is simple – the hatch is not being pulled tightly enough against the seal. A latch or catch can make a big difference by compressing the weatherstrip properly.
This is especially useful on older lift-out hatches that just rest in place under their own weight. Without any pressure on the frame, the seal may not engage evenly. Add a proper closing mechanism, and the same hatch can perform much better.
The trade-off is convenience. If you use the attic often, you want a latch that feels secure but is still easy to operate. Nobody wants to wrestle with the hatch every time they need a suitcase or Christmas decorations.
4. Build an insulated hatch box above the opening
If you want a stronger thermal barrier, an insulated box or cover above the attic opening can help. This sits on the attic side and covers the hatch area, reducing heat loss through the access point.
It is a practical option where the hatch itself cannot take much additional weight or where the opening is awkwardly shaped. By insulating above the opening, you are treating the hatch area more like the rest of the attic floor.
This can work well, but only if it is still easy to remove or lift for access. If the cover is bulky, flimsy, or inconvenient, it tends to get pushed aside and never put back properly. For busy households, ease of use matters more than people think.
5. Upgrade to an insulated attic door
Sometimes the best answer is not patching the old hatch. It is replacing it with a properly insulated attic door designed to seal well and work smoothly. This is often the better long-term option when the current hatch is warped, thin, damaged, or just poorly fitted from the start.
A good insulated attic door improves thermal performance, but it also improves the overall finish of the opening. It should close neatly, feel more solid, and work better with modern attic access setups. If you are also adding a new attic ladder or planning to use the space for storage, doing the full upgrade at once usually makes more sense than trying to improve a weak hatch in stages.
That is often where specialist fitting pays off. A neat, tight fit matters just as much as the product itself.
6. Seal joints with airtight tape
If there are visible gaps or rough joins between the hatch frame and surrounding ceiling opening, airtight tape can help reduce leakage. This is more about detailing than major insulation value, but small leaks add up.
The key is using it where it actually helps. Tape is useful on clean, stable surfaces and around fixed joints. It is not a cure-all for a badly fitting hatch or a twisted frame. If the movement is in the door itself, tape alone will not solve it.
Still, when combined with insulation and weatherstripping, it can help finish the job properly rather than leaving weak spots around the edges.
7. Insulate and seal the attic ladder opening as a system
If your hatch is connected to a folding attic ladder, the whole opening needs to be considered together. Many ladder doors have very little insulation, and some older units are notorious for air leakage around the frame.
This is where homeowners can waste time trying one small fix after another. You can add foam, tape, and seals, but if the ladder unit itself is outdated or poorly installed, the result may still be disappointing. In many cases, the most effective upgrade is a complete insulated attic access system with a properly fitted ladder, insulated door, and sealed frame.
For a family using the attic as real storage space, this is usually the most practical route. You get easier access, a cleaner finish, and better energy performance at the same time.
What works best for different homes
Not every home needs the same solution. If you have a basic hatch that is structurally sound and only used occasionally, adding rigid foam and weatherstripping may be enough. If you feel obvious drafts or the panel never sits right, latches and air sealing may need to come first.
If the hatch is part of an older ladder system, replacement is often the smarter investment. There is little value in improving a hatch halfway if the unit still leaks, sticks, or feels unsafe. Most homeowners want the same thing – a hatch that is easy to use, neatly finished, and not letting warm air escape into the attic.
Common mistakes with attic hatch insulation ideas
The biggest mistake is focusing only on insulation thickness. A thicker hatch does not always mean a better result if air is still leaking around the frame. In real homes, draft control often matters just as much as the insulating material.
Another common issue is making the hatch too heavy. That can create strain on hinges, affect alignment, and make attic access less safe. This is especially relevant if children or older adults may need to use the hatch.
Poor fit is another recurring problem. DIY improvements can help, but if the opening is uneven or the hatch was never installed well in the first place, you can end up spending money on materials without fixing the core issue.
When to repair and when to replace
If the hatch is in decent condition, sits squarely, and just lacks insulation or sealing, an upgrade can be worthwhile. But if it is warped, flimsy, difficult to close, or part of a dated attic ladder setup, replacement is usually the more reliable answer.
That is especially true if you are already improving the attic for storage. Once people start using the space regularly, a weak hatch becomes more than an energy issue. It becomes an everyday annoyance. A well-fitted insulated hatch or ladder door tends to save hassle as much as it saves heat.
For homeowners who want a clean finish without trial and error, it often makes sense to have the whole access point assessed properly. Companies like AOS Attic Ladders & Flooring see this every day – the hatch itself is often the small detail causing a much bigger comfort problem.
A good attic hatch should not be something you notice. It should close cleanly, keep drafts out, and let you use the attic without thinking twice about it.